Solar systems rarely fail overnight. Their performance usually fades through small, visible weaknesses: dusty modules, aging inverters, loose connections, or limited battery capacity. Learning how to upgrade an existing solar system can recover lost production without replacing every component. The right upgrade begins with evidence, not assumptions. A technician should review twelve months of bills, inverter alerts, shading changes, roof conditions, and measured output.
Industry growth makes this assessment increasingly important. The International Energy Agency reported that global renewable capacity additions reached about 510 gigawatts in 2023. Solar photovoltaics represented roughly three-quarters of that expansion. Existing systems now operate beside newer, more efficient equipment. However, newer does not always mean compatible. Voltage limits, connector types, inverter architecture, and local electrical requirements can restrict upgrade choices.
Performance declines slowly. The National Renewable Energy Laboratory found a median photovoltaic degradation rate near 0.5% annually across its reviewed systems. That figure is useful, but it is not a promise for every installation. Poor ventilation, harsh weather, and installation defects can accelerate losses. Sometimes, cleaning and software updates deliver more value than additional panels. That is easy to overlook.
This guide presents ten practical upgrade paths, including panel expansion, inverter replacement, battery integration, monitoring improvements, and load management. Each option should be judged by energy demand, roof space, budget, safety, and expected payback. A careful installer will document assumptions and explain uncertainties. No upgrade is universally best. The strongest decision is measurable, compatible, and prepared for future household needs.
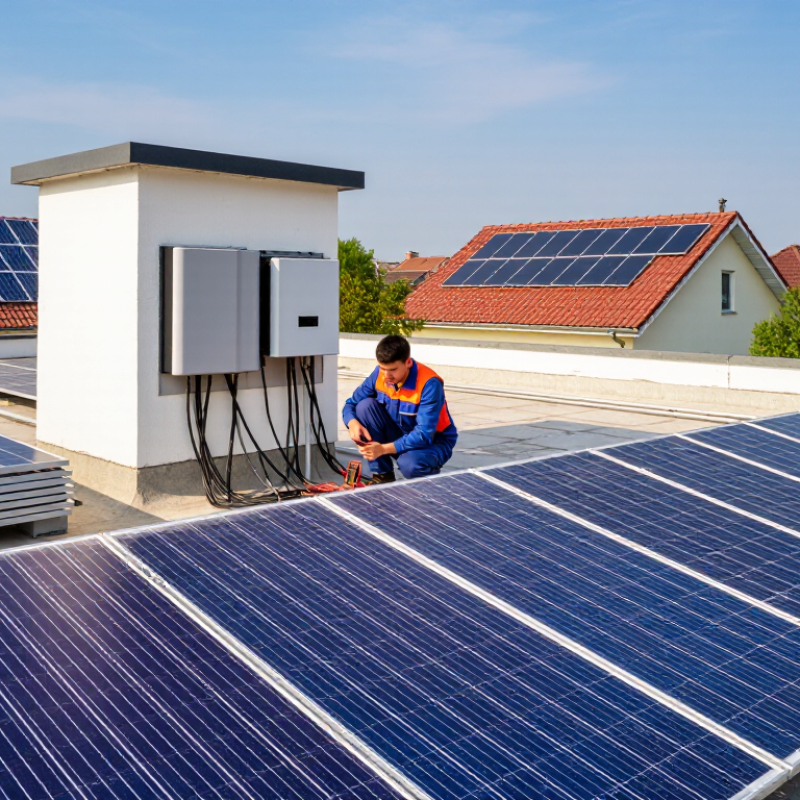
Before upgrading an existing solar system, measure what it actually delivers. Start with twelve months of utility bills and inverter records, not a sales estimate. Compare seasonal output with the original design and local sunlight data. Lower production may indicate shading, dust, loose connections, or aging modules. Look for patterns.
During an inspection, check each module for cracks, discoloration, frame corrosion, and lifted seals. Examine mounting rails, cable insulation, connectors, and roof penetrations. A qualified electrician should verify voltage, current, grounding, and protective devices with calibrated instruments. Thermal imaging can reveal hot connections that normal viewing misses. Battery systems need extra checks, including charge consistency, temperature history, ventilation, and fault logs. Keep clear records.
I once treated lower monthly production as proof that the inverter needed replacement. The real problem was afternoon shade from a newly grown tree. That mistake changed my process. Test before buying. Also question old assumptions; original load estimates may no longer match electric vehicles, heat pumps, or home offices. Some equipment may remain serviceable, but safety labels, warranties, and installation codes require professional review. If performance data is incomplete, say so. Honest uncertainty is better than an upgrade plan built on guesswork.
Assess the Current Solar System’s Performance and Equipment Condition
| Rank | Upgrade Area | Current-System Assessment | Key Performance or Condition Indicator | Recommended Upgrade | Typical Expected Benefit | Priority |
|---|---|---|---|---|---|---|
| 1 | Measure Actual Energy Production | Annual output is approximately 6,240 kWh from a 5.2 kW residential array. | Specific yield: 1,200 kWh/kW/year; performance ratio: 78%. | Install revenue-grade monitoring and compare monthly production with modeled irradiance-adjusted output. | Identifies hidden losses and may recover 3–8% of annual energy through corrective action. | High |
| 2 | Inspect and Test the Inverter | The inverter has operated for approximately 9 years and shows intermittent fault events. | Typical string-inverter service life: 10–15 years; repeated faults or efficiency below 96% require review. | Replace an aging inverter with a modern high-efficiency unit or add module-level power electronics where shading is significant. | Improves reliability and can increase conversion efficiency by approximately 1–3%. | High |
| 3 | Clean Modules and Correct Soiling | Visible dust and pollen accumulation are present, with no regular cleaning schedule. | Moderate soiling commonly reduces output by 2–6%; heavy dust or bird deposits can cause larger localized losses. | Clean modules using approved non-abrasive methods and establish inspection intervals based on local rainfall and dust conditions. | Potential short-term production recovery of 2–6% where soiling is measurable. | Medium |
| 4 | Repair Shading and Optimize Layout | Late-afternoon shading affects approximately 15% of the array during spring and summer. | Partial shading on one module can reduce the output of a series string if bypass and tracking are not optimized. | Trim or relocate obstructions where permitted, redesign string groupings, or use module-level optimization. | Typical recovery ranges from 5–15% for consistently shaded arrays. | High |
| 5 | Evaluate Module Degradation | The photovoltaic modules are approximately 11 years old and annual production has gradually declined. | Modern crystalline-silicon modules commonly degrade around 0.3–0.8% per year, depending on design and operating conditions. | Perform infrared imaging, electroluminescence testing, and IV-curve testing before deciding between selective replacement and full repowering. | Targeted replacement can restore approximately 5–12% of lost capacity when failures are confirmed. | Medium |
| 6 | Upgrade the Mounting and Roof Interface | Roof penetrations and mounting hardware show surface corrosion, while sealant condition is inconsistent. | Loose fasteners, corrosion, cracked flashing, or water ingress are safety and asset-protection concerns. | Replace damaged hardware, renew weatherproofing, verify torque, and confirm structural attachment points. | Reduces water-intrusion risk and may extend the usable life of the solar installation by 10+ years. | High |
| 7 | Improve Electrical Safety and Cabling | DC cables are exposed to ultraviolet radiation, and labels are incomplete in the equipment area. | Inspect insulation, connectors, grounding continuity, overcurrent protection, and cable management for heat or arcing damage. | Replace damaged connectors and cables, improve labeling, update disconnects, and verify protective-device coordination. | Reduces fault and fire risk while preventing avoidable downtime; production gain depends on defects found. | High |
| 8 | Add Battery Energy Storage | Approximately 35% of solar electricity is exported because household demand occurs mainly in the evening. | Self-consumption is approximately 65%; evening demand creates a suitable load-shifting opportunity. | Consider a battery sized around 5–10 kWh usable capacity, subject to load analysis, tariffs, and backup requirements. | Self-consumption may increase to approximately 80–95%, depending on daily loads and battery operation. | Medium |
| 9 | Increase Array Capacity | The existing inverter and electrical service have limited unused capacity, while annual electricity demand is rising. | Available roof area, inverter oversizing limits, service capacity, and local interconnection rules must be verified. | Add approximately 2–4 kW of modules using a compatible inverter or a separately interconnected system. | Can add approximately 2,400–4,800 kWh/year in a location producing about 1,200 kWh/kW/year. | Medium |
| 10 | Integrate Energy Management and Electric Loads | Water heating, vehicle charging, and other flexible loads are not coordinated with solar production. | Only approximately 20–30% of daytime solar generation is directly consumed on-site. | Add smart load controls and schedule compatible loads between late morning and mid-afternoon. | May increase direct solar use by approximately 10–25 percentage points without adding more modules. | Low to Medium |
Review twelve months of utility bills and inverter records. Compare seasonal output with the original design and local sunlight data. Sales estimates are not enough.
Shading, dust, loose connections, and aging modules can reduce output. A growing tree once caused an afternoon decline. Look for repeated patterns.
Check modules for cracks, discoloration, corrosion, and lifted seals. Inspect mounting rails, cable insulation, connectors, and roof penetrations. Small defects can become larger faults.
A qualified electrician should check voltage, current, grounding, and protective devices. Calibrated instruments provide more reliable results. Thermal imaging can reveal hidden hot connections.
Review charging consistency, temperature history, ventilation, and fault logs. Confirm that the battery reaches its intended capacity. Unusual heat needs prompt professional attention.
Record the original output, panel condition, battery settings, and inverter readings. Test the upgraded system during clear, cloudy, and rainy conditions. Compare display readings with an independent meter when possible.
Watch for unusual heat, noise, error messages, and sudden power drops. Check cable connections, grounding, mounting security, and protective devices. Small warnings matter.
Keep monthly records for solar production, household use, battery cycles, and grid imports. A simple spreadsheet can show gradual declines. Review the data every three months.
State the uncertainty clearly. Do not build an upgrade plan on guesses. My earlier shade assessment was incomplete, so I changed the process and now record photographs at several times.
Seek qualified guidance for electrical settings, safety labels, warranties, and installation requirements. Investigate changes beyond normal seasonal variation. Better checking beats confident guessing.
Upgrading an existing solar system begins with a careful review of its current performance and equipment condition. Check energy production, panel output, inverter operation, battery health, wiring, mounting structures, and monitoring data to identify aging or underperforming components. Next, clarify your upgrade goals, such as increasing energy production, improving backup capacity, reducing grid dependence, or supporting new household loads. Evaluate available roof or ground space, local sunlight, system capacity, and future electricity needs before selecting compatible panels, inverters, batteries, and monitoring devices.
A successful upgrade also requires thoughtful electrical integration and attention to permits, safety requirements, structural limits, and installation procedures. All components should work together without exceeding the limits of the existing system. After installation, test each part, confirm that protective devices and monitoring functions operate correctly, and record the system’s baseline performance. Long-term tracking of energy generation, consumption, battery behavior, and system alerts will help reveal problems early and verify whether the upgrade meets expectations. This practical approach explains how to upgrade an existing solar system safely, efficiently, and according to changing energy needs.

 Smart Energy